How to Make a DIY Paper Portrait Step-by-Step Guide
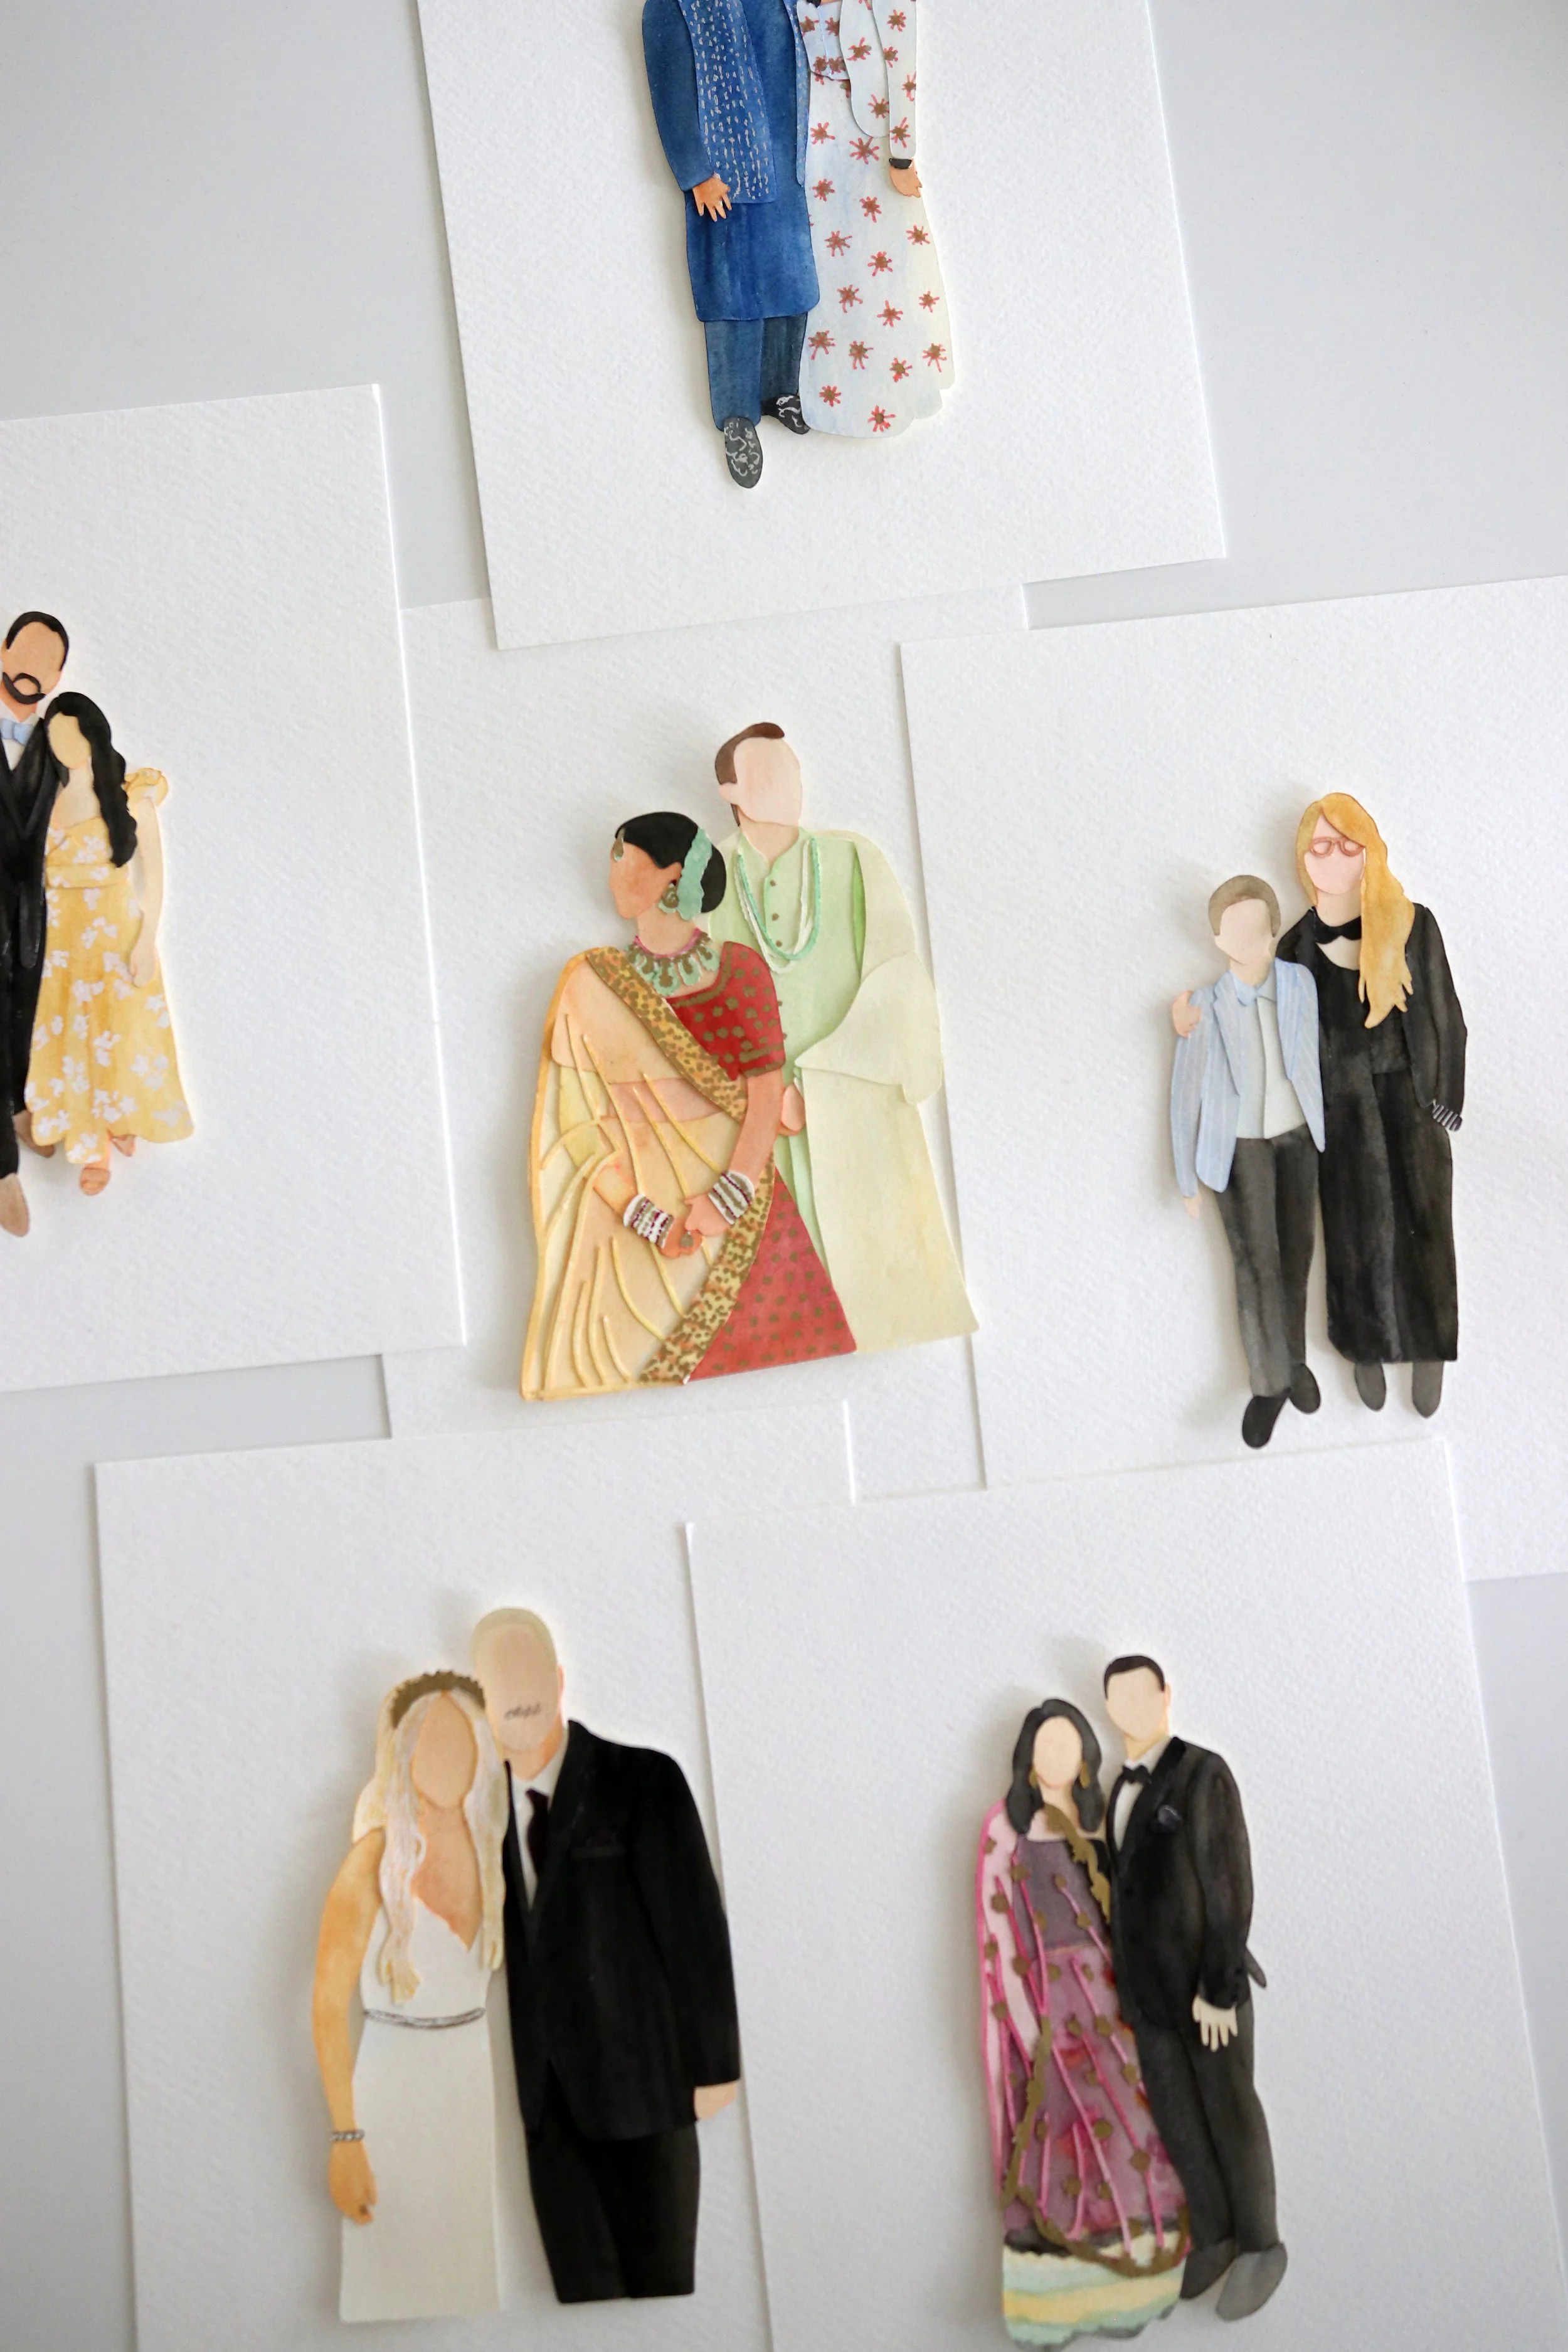
A paper portrait is a creative and personal way to capture a special moment. Whether you're making one for a birthday, anniversary, wedding, or just as a fun art project, this layered paper design adds a unique touch to any occasion.
In this tutorial, I’ll guide you through how to create a custom paper portrait using Procreate on your iPad, a Cricut or Silhouette cutting machine, and simple watercolor techniques. This method is perfect for greeting cards, framed artwork, or even digital illustrations.
What You’ll Need:
✔ Reference photo + iPad + Apple Pen with Procreate
✔ Blank Card + White Cardstock Paper
✔ Cricut or Silhouette
✔ Watercolor Palette
✔ Watercolor travel brush
✔ White craft glue


Step 1: Create the Paper Portrait Outline in Procreate
1️⃣ Import your reference photo into Procreate.
2️⃣ On a new layer, draw a rough body outline. Keep this layer slightly smaller than the actual image since it will be the base for all other pieces.
3️⃣ Color match each section as you go. The hands are the only part that needs extra detail since they will be fully visible.
✏ Pro Tip: Hide the reference image occasionally to check the accuracy of your shapes.


Step 2: Draw the Facial Features & Hair
1️⃣ Lower the body layer’s opacity and create a new layer for the face outline.
2️⃣ Use the first body shape as a base for the neck and ears.
3️⃣ Add a separate hair layer, followed by the clothing layers.
For shirts with buttons, divide them into sleeves, left, and right sides to create a natural folded look. Do the same with pants—separating them into left and right sections adds depth.
🎨 Color Matching Tip: Use slightly different shades for different sections to help distinguish layers when assembling.
Step 3: Prepare Your File for Cutting
1️⃣ Save the completed image before separating the layers for the final reference.
2️⃣ If you're cutting with a Cricut or Silhouette, take each layer from top to bottom and arrange them on separate.
3️⃣ Save this as a PNG file with a transparent background.
4️⃣ Upload the PNG files into Cricut Design Space or Silhouette, then resize them according to your project.
📌 My Setup: I sized my portrait to fit a 5x8 card and used letter-size 65lb white cardstock for cutting.
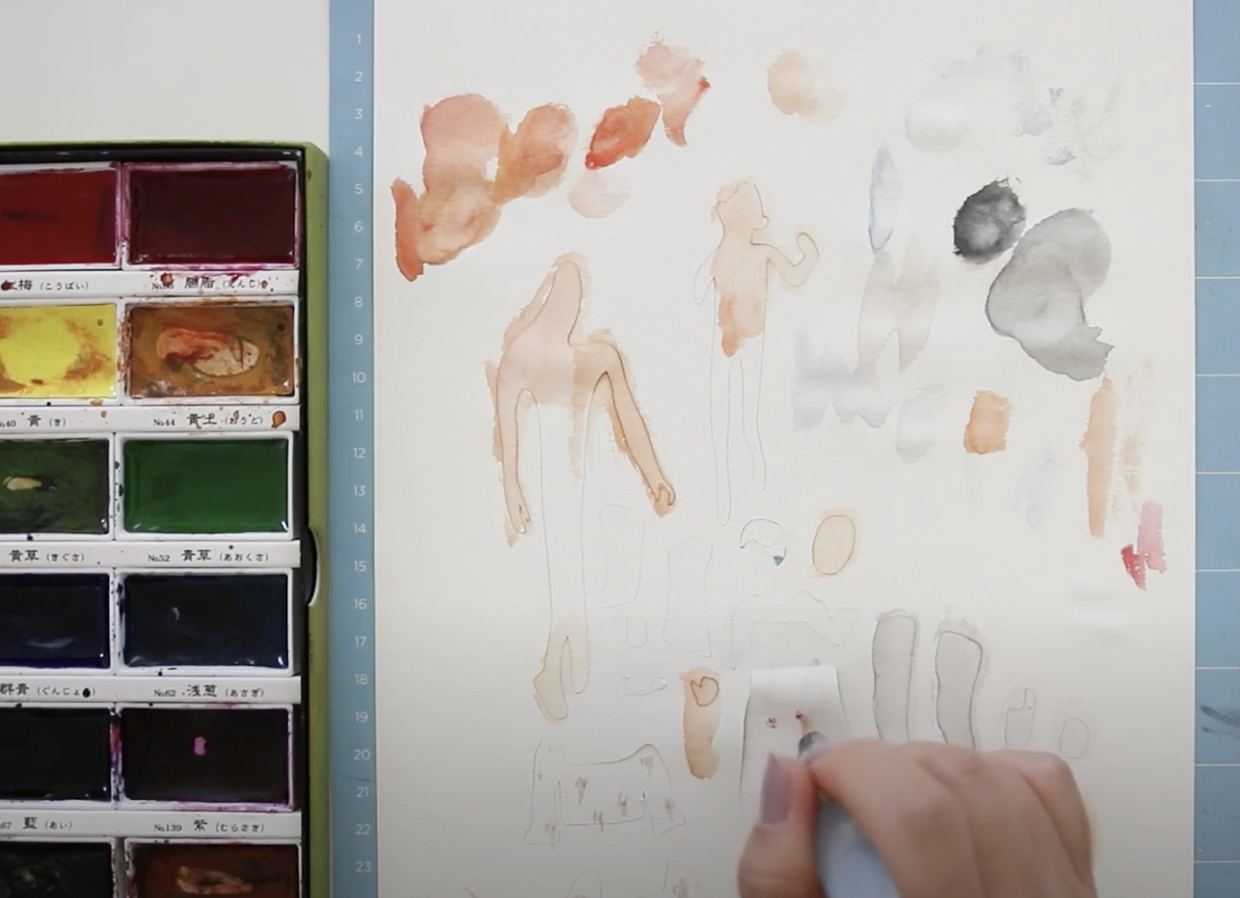
Step 4: Add Watercolor Details
Once your pieces are cut, it’s time to bring them to life with easy watercolor.
🖌 Watercolor Steps:
✔ Use a travel watercolor brush for precision.
✔ Start with lighter colors first, then layer in darker shades.
✔ Use your original Procreate image as a reference for color accuracy.


Step 5: Assemble the Paper Portrait
Now for the best part—putting everything together!
1️⃣ Lay out all the cut paper layers next to your reference image.
2️⃣ Use small dabs of white glue to attach each piece, starting with the bottom layers first.
3️⃣ Press down lightly and let everything dry completely before handling.
✂ Final Touches: Once dry, you can add your portrait to a card, frame it as a keepsake, or even turn it into a sticker or scrapbook piece!
Final Thoughts
Find the video tutorial above. A DIY paper portrait is a fun and meaningful project that works for any occasion. Whether you're making one for yourself or as a gift, the layered paper effect creates a stunning, hand-crafted look that’s sure to impress.
📌 Want a Custom Portrait? I also take orders! If you’d like me to create a personalized paper portrait for you, visit here to place an order.
💬 Have you tried making a paper portrait before? Let me know in the comments! Don’t forget to pin this post for later and share your creations on Instagram—tag me so I can see your amazing work!
-Sara Kim