DIY Paper Strawberries – How to Make Realistic Strawberries with Cardstock!
If you’re looking for a charming and fun paper craft, these realistic paper strawberries are a perfect project! In this step-by-step guide, I’ll show you how to create stunning paper strawberries with cardstock, floral wire, and a bit of creativity. You can find the template on my website, perfect for Cricut, Silhouette, or other cutting machines. Let’s get started!

Materials You’ll Need:
Strawberry Template- https://www.handmadebysarakim.com/digital-templates/strawberry
Green Cardstock Paper (use discount code “SARAKIM10”)- https://www.12x12cardstock.shop/?p=BkRvWGQ5n
Green Floral Wire- https://bit.ly/4dU99mI
Mod Podge Gloss- https://bit.ly/3RBNHeW
Paint Brush- https://bit.ly/3tb2N0H
Acrylic Marker- https://bit.ly/4hm4XiK
Alcohol Marker- https://bit.ly/3CE6n8N
Wire Cutter + Poking Tool- https://bit.ly/3uv7QEI
Green Floral Tape- https://bit.ly/2VtGXVP
White glue- https://bit.ly/3PAi42t
Cricut Maker-https://bit.ly/3M24JhI
Silhouette Cameo- https://bit.ly/42M6Ooz

Step 1: Create the Strawberry Base
Cut the Strawberry Pattern: Use red cardstock paper to cut the strawberry pattern.
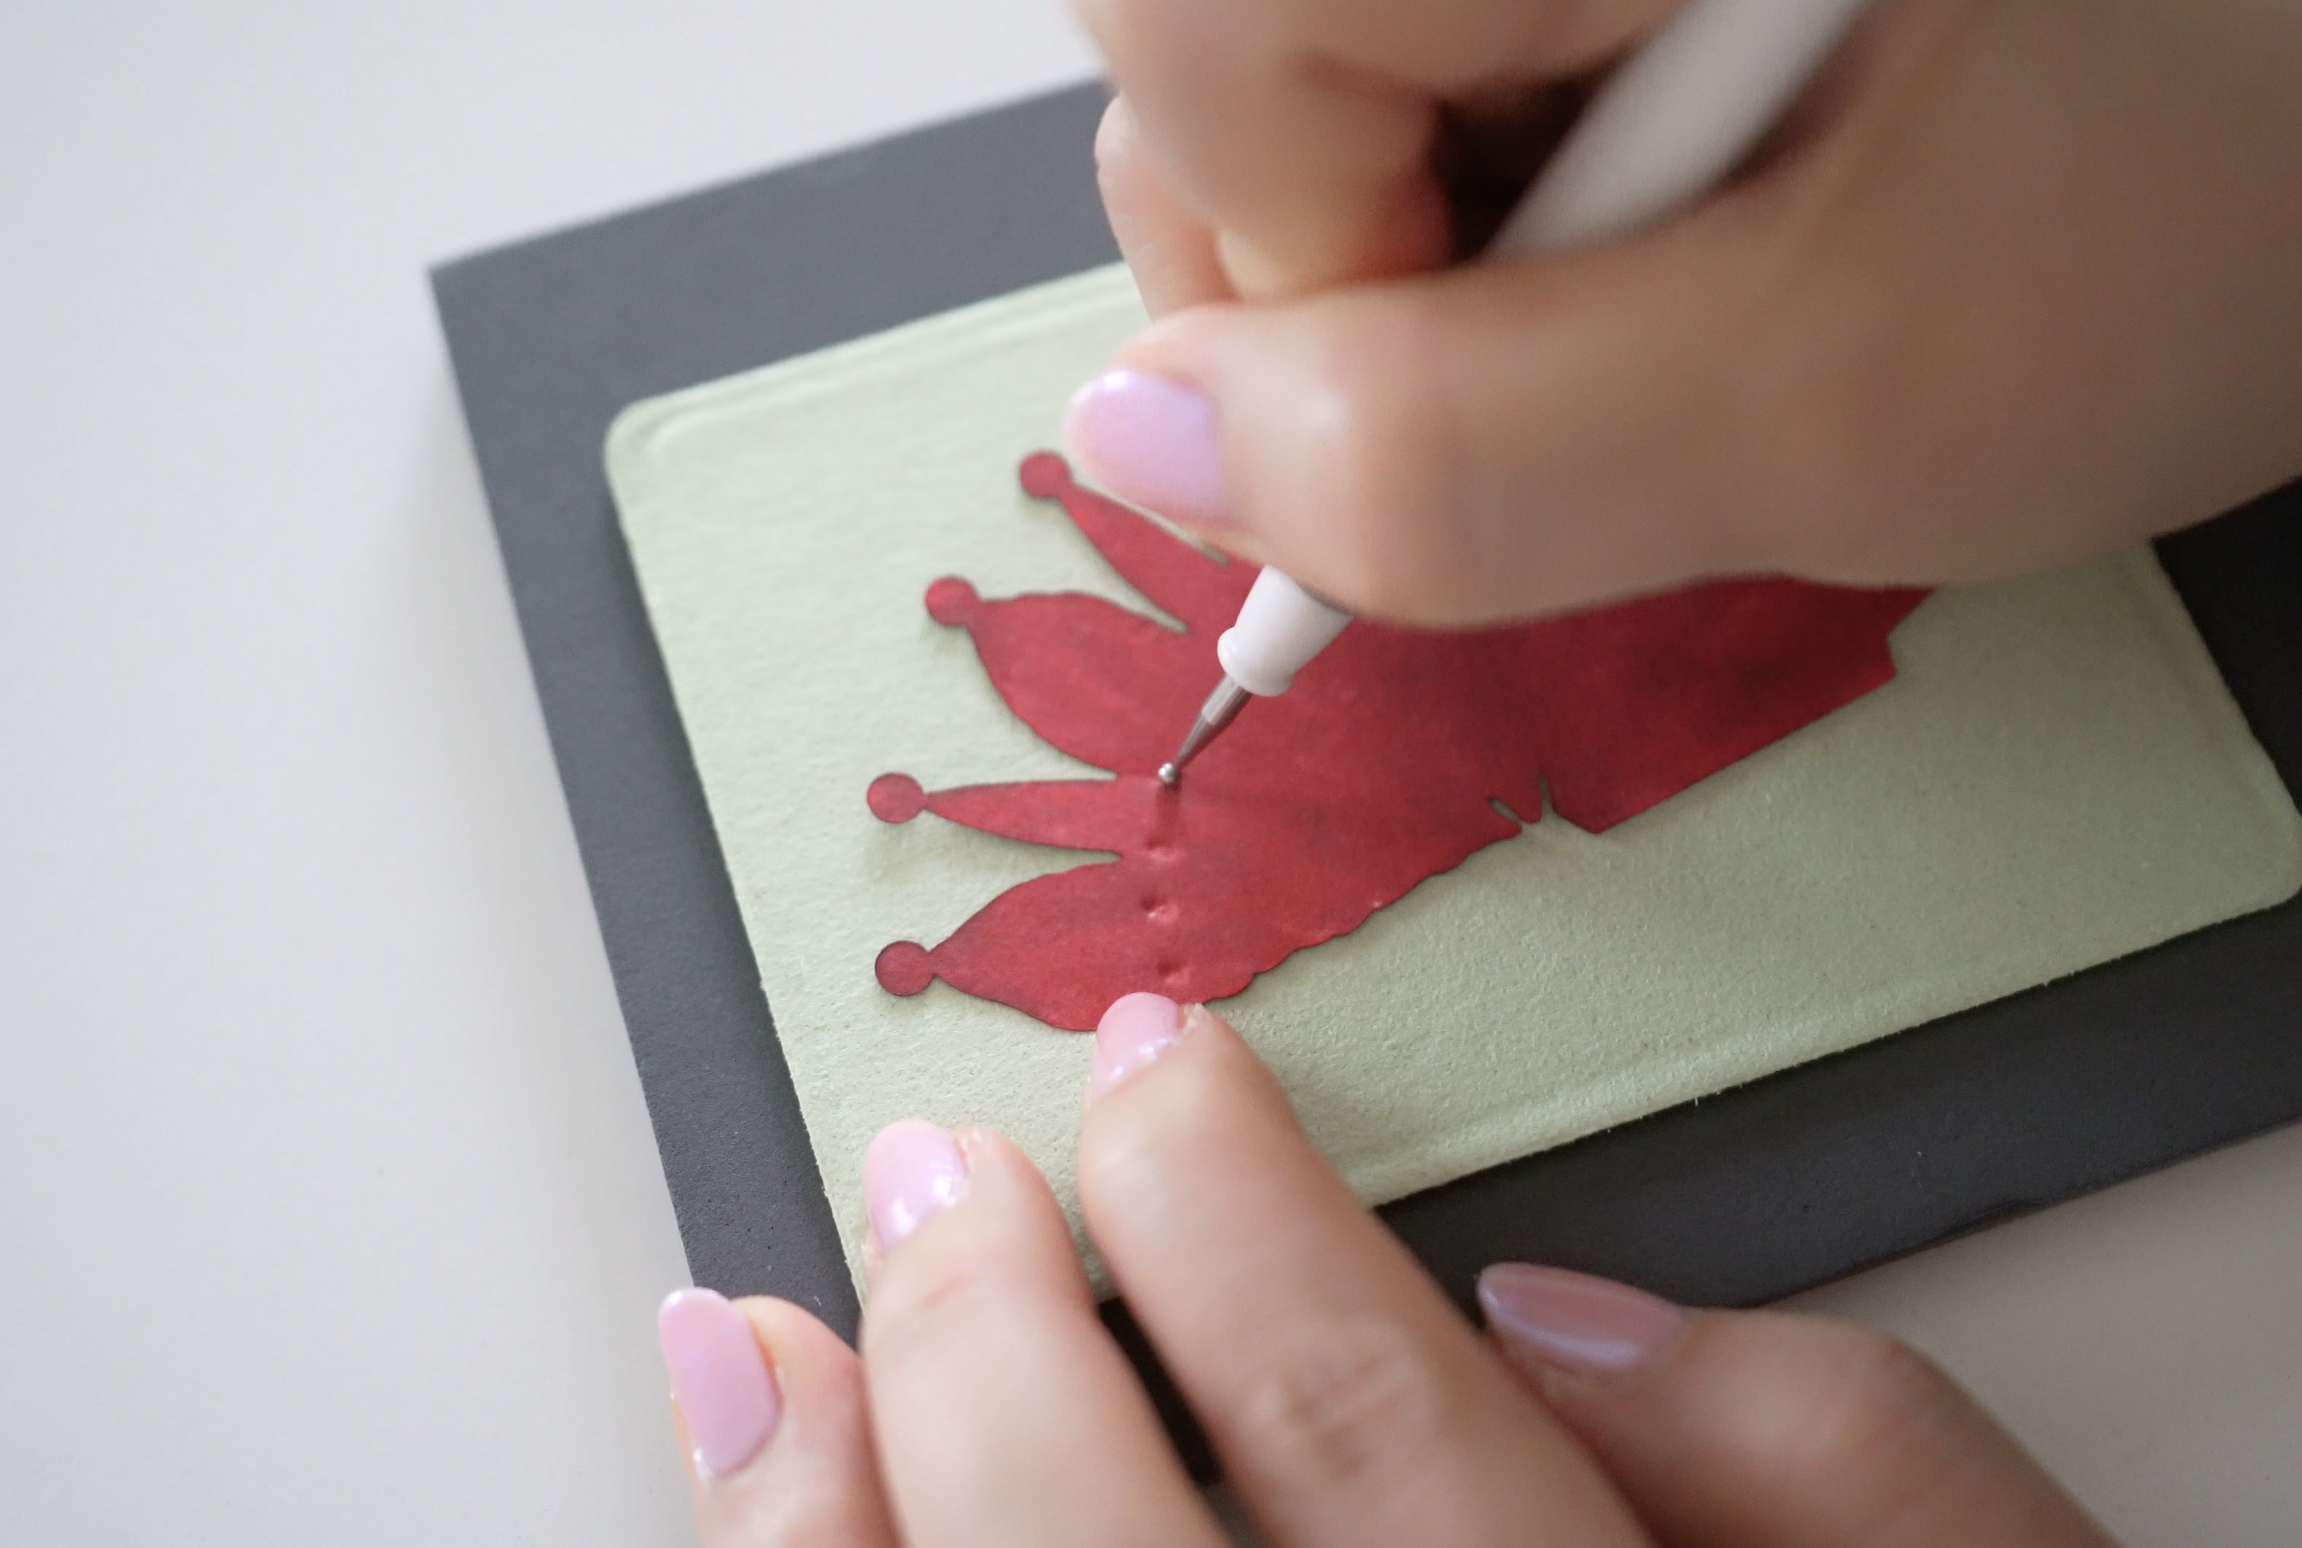
Emboss the Details: On the half-circle pattern, use a 2mm fine detail ball tool and emboss small oval shapes, creating a rainbow pattern.
Add Seeds: Use a yellow acrylic marker to gently fill in the embossed ovals. Allow everything to dry.
Shape the Strawberry: Use the larger ball tool to shape the half-circle and triangles, curving them slightly.

Step 2: Assemble the Strawberry Shape
Glue the Edges: Apply white glue along the straight side of the strawberry pattern. Overlap the jaggedy edge over the straight side, forming a cone shape.
Shape the Bottom: Use a ball tool to round out the base of the strawberry.
Glue the Triangles: Start gluing the small triangles first, pressing each edge and holding until the glue sets. Use pliers if it becomes too narrow for your fingers. Continue gluing the larger triangles in sequence. Use hot glue for the final triangle to ensure a quick dry.

Step 3: Add the Strawberry Leaves
Prepare the Floral Wire: Loop the end of a 22-gauge floral wire, making a small perpendicular loop.
Bottom Leaves: Use two green cardstock leaves (one with straight edges, one with jaggedy edges). Poke a hole in the straight-edged leaf, thread the floral wire through, and glue the wire loop to the leaf. Sandwich the wire with the jaggedy-edged leaf on top.
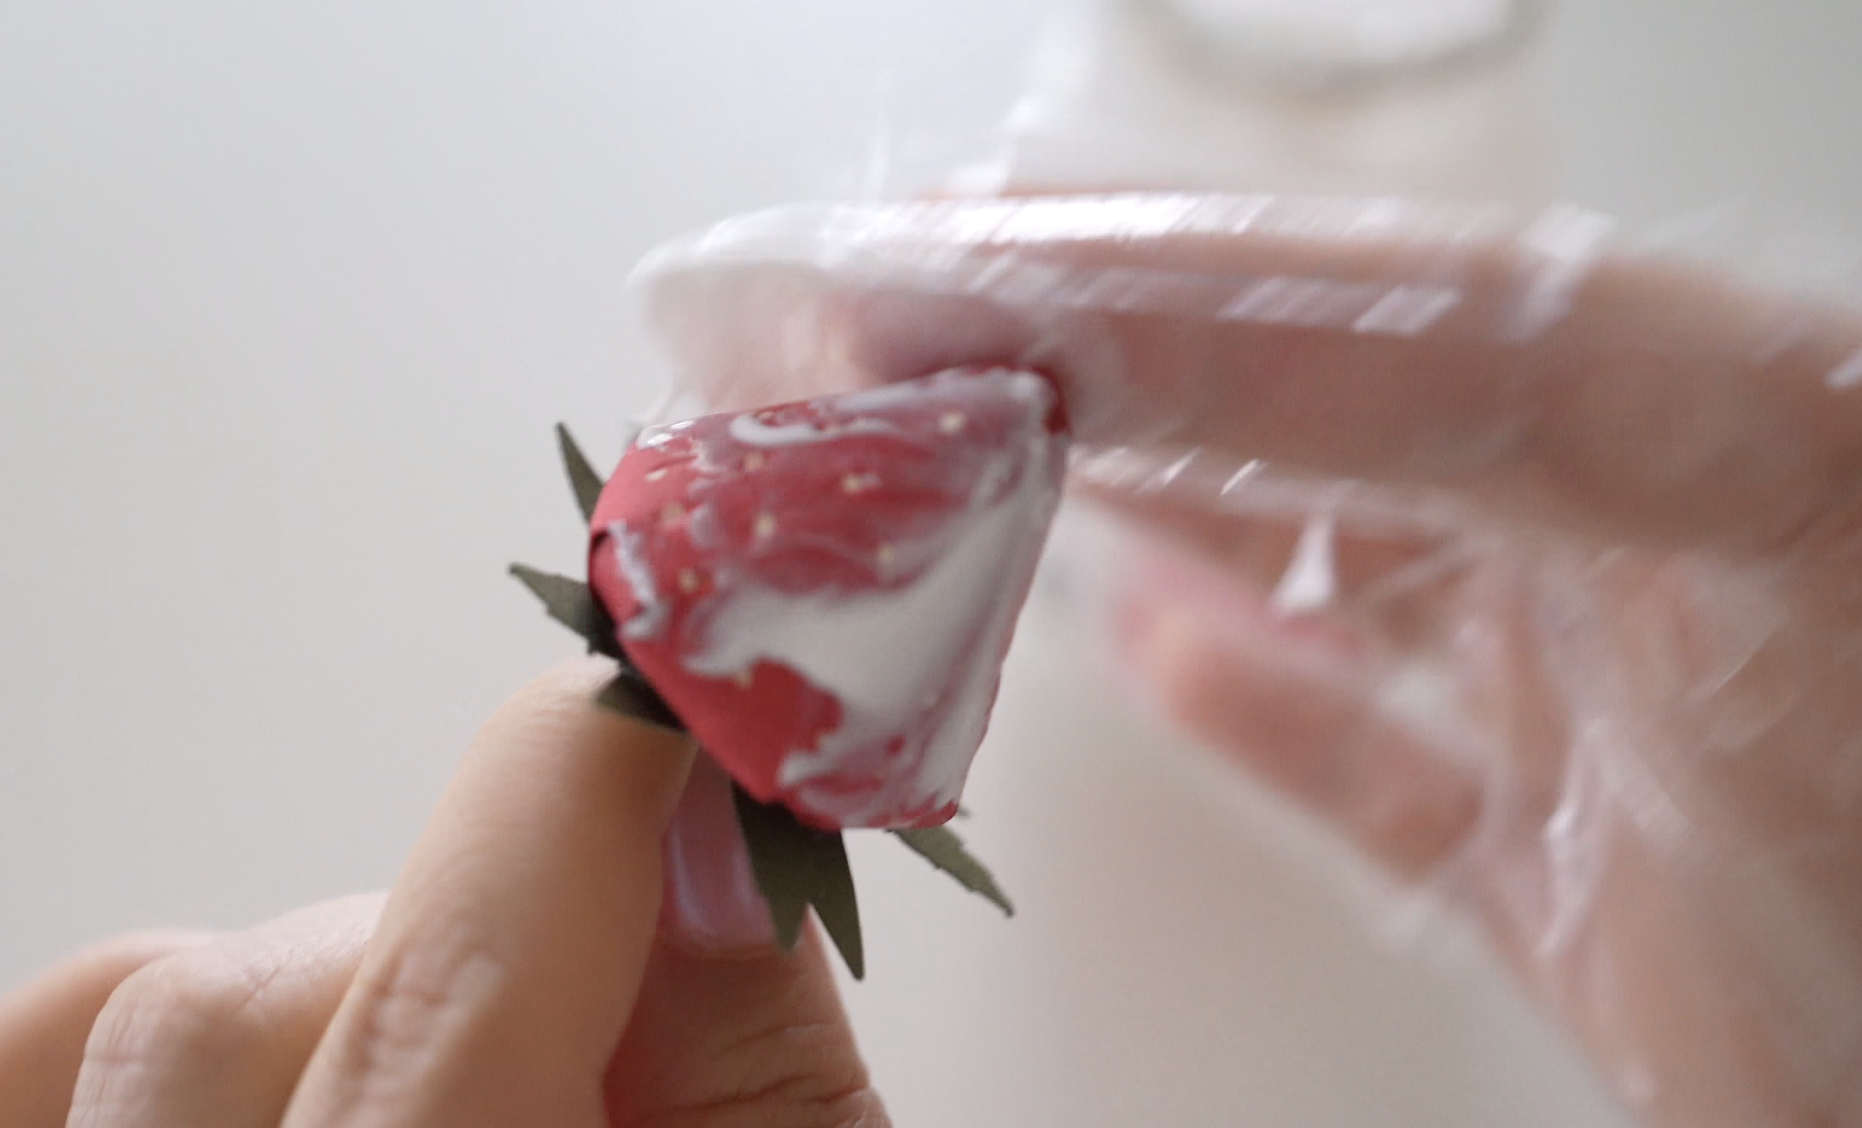
Attach the Strawberry: Use hot glue to attach the strawberry to the leaves.
Gloss Finish: Apply gloss Mod Podge with gloves, carefully coating the strawberry (avoid the leaves) for a shiny, realistic finish.
Step 4: Create the Leaves and Flowers
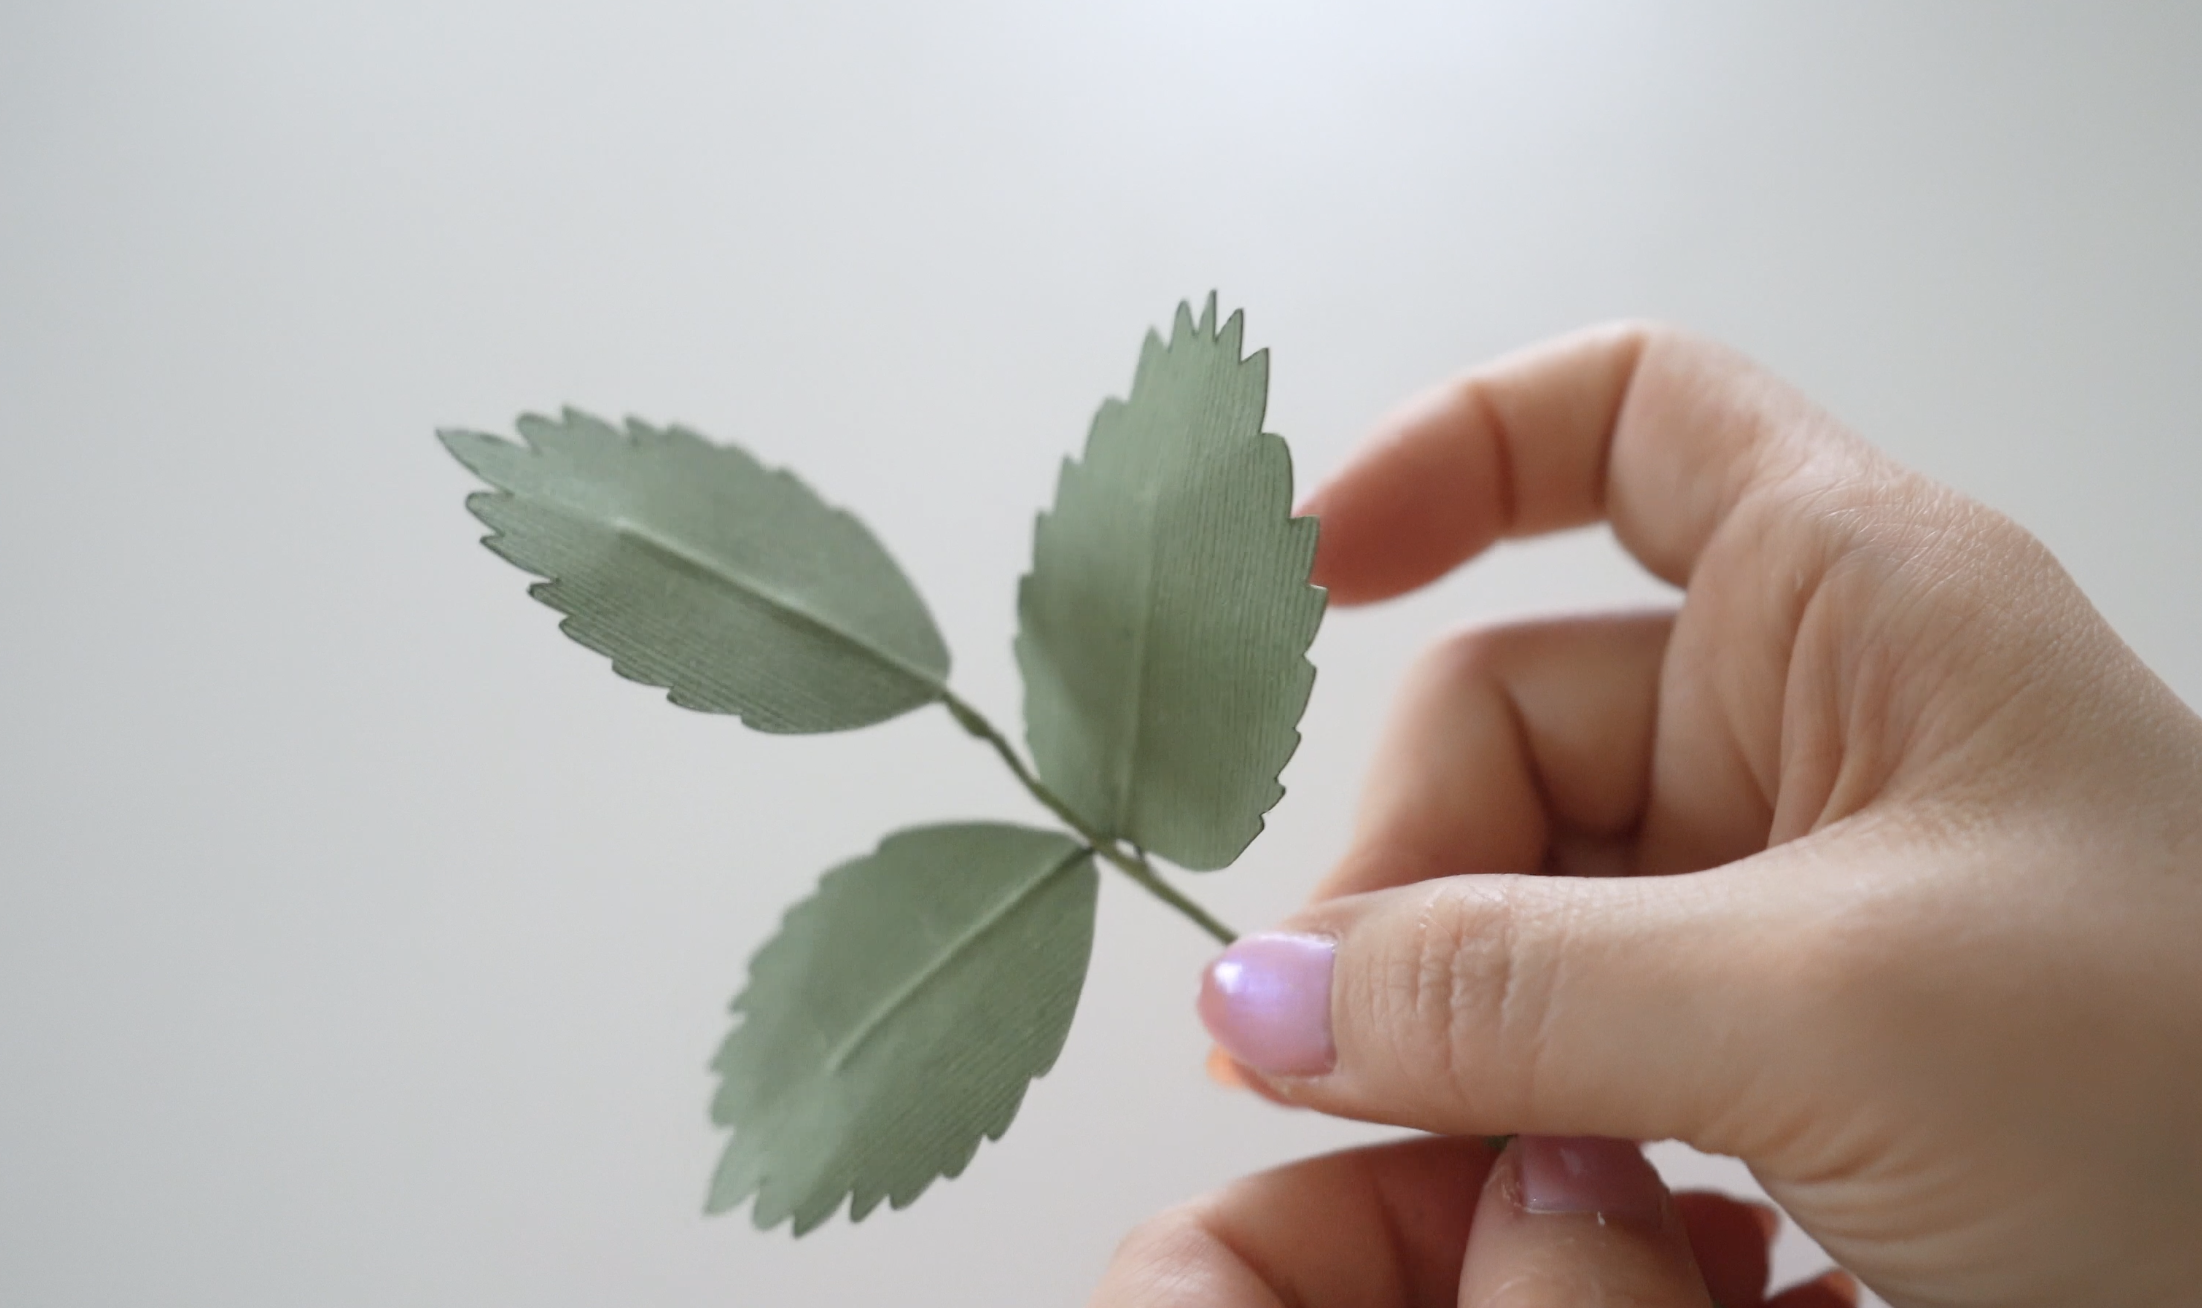
Leaves: Cut and assemble various sizes of green leaves, sandwiching floral wire between two pieces of cardstock. Use floral tape to create small branches of 2-3 leaves.
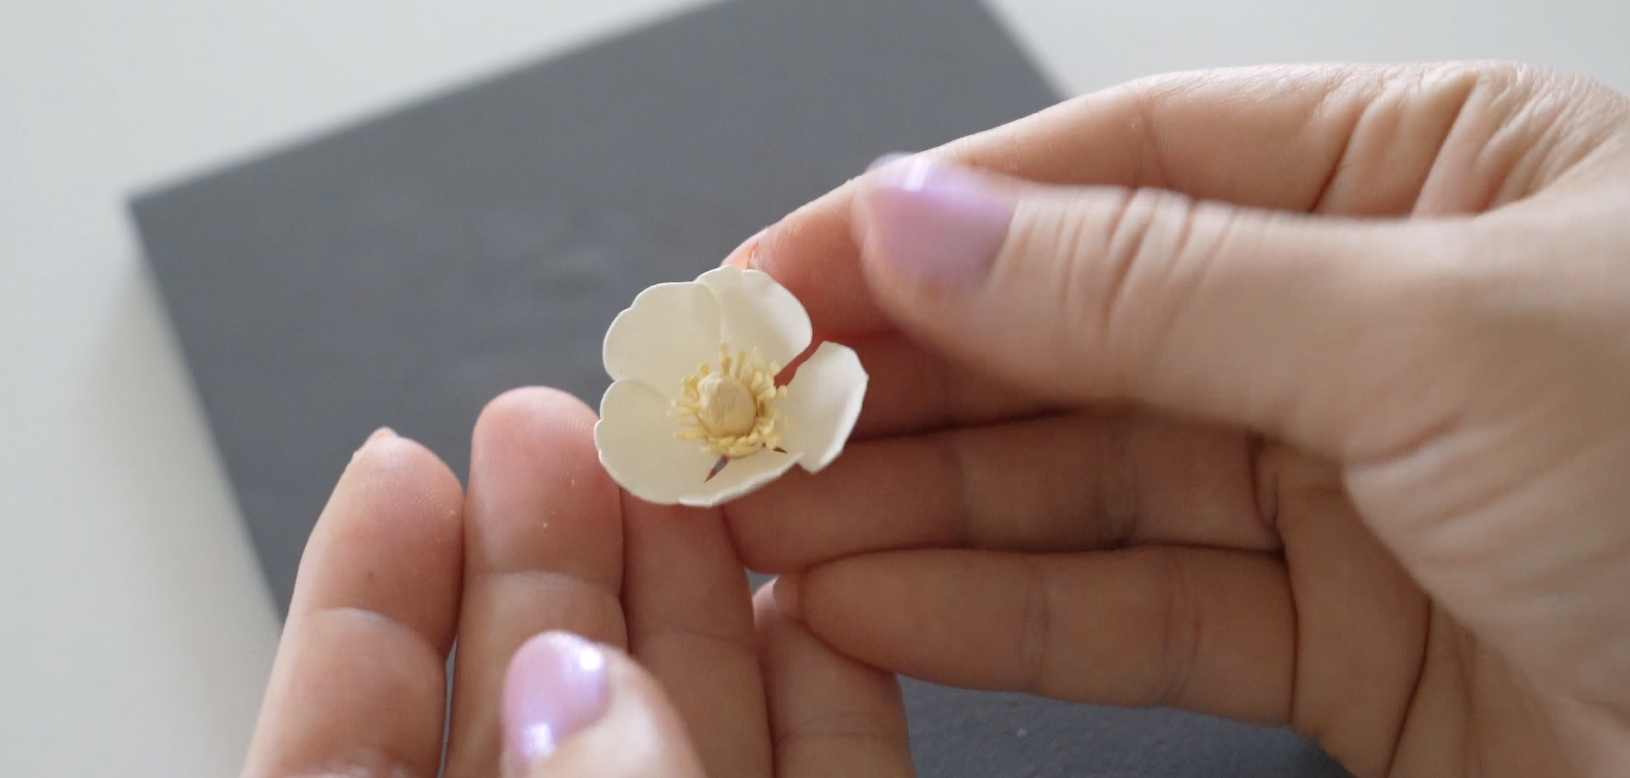
White Flowers: Cut white cardstock flowers. Shape the petals with a ball tool.
Make a yellow center by coloring white tissue paper with a yellow marker.
Create a small tissue ball, wrap it with a square of tissue, and trim the excess.
Use a fringed yellow center piece, wrap it around the tissue ball, and glue to the center of the flower.
Attach the flower to a floral wire with bottom leaves, using the same sandwiching technique.
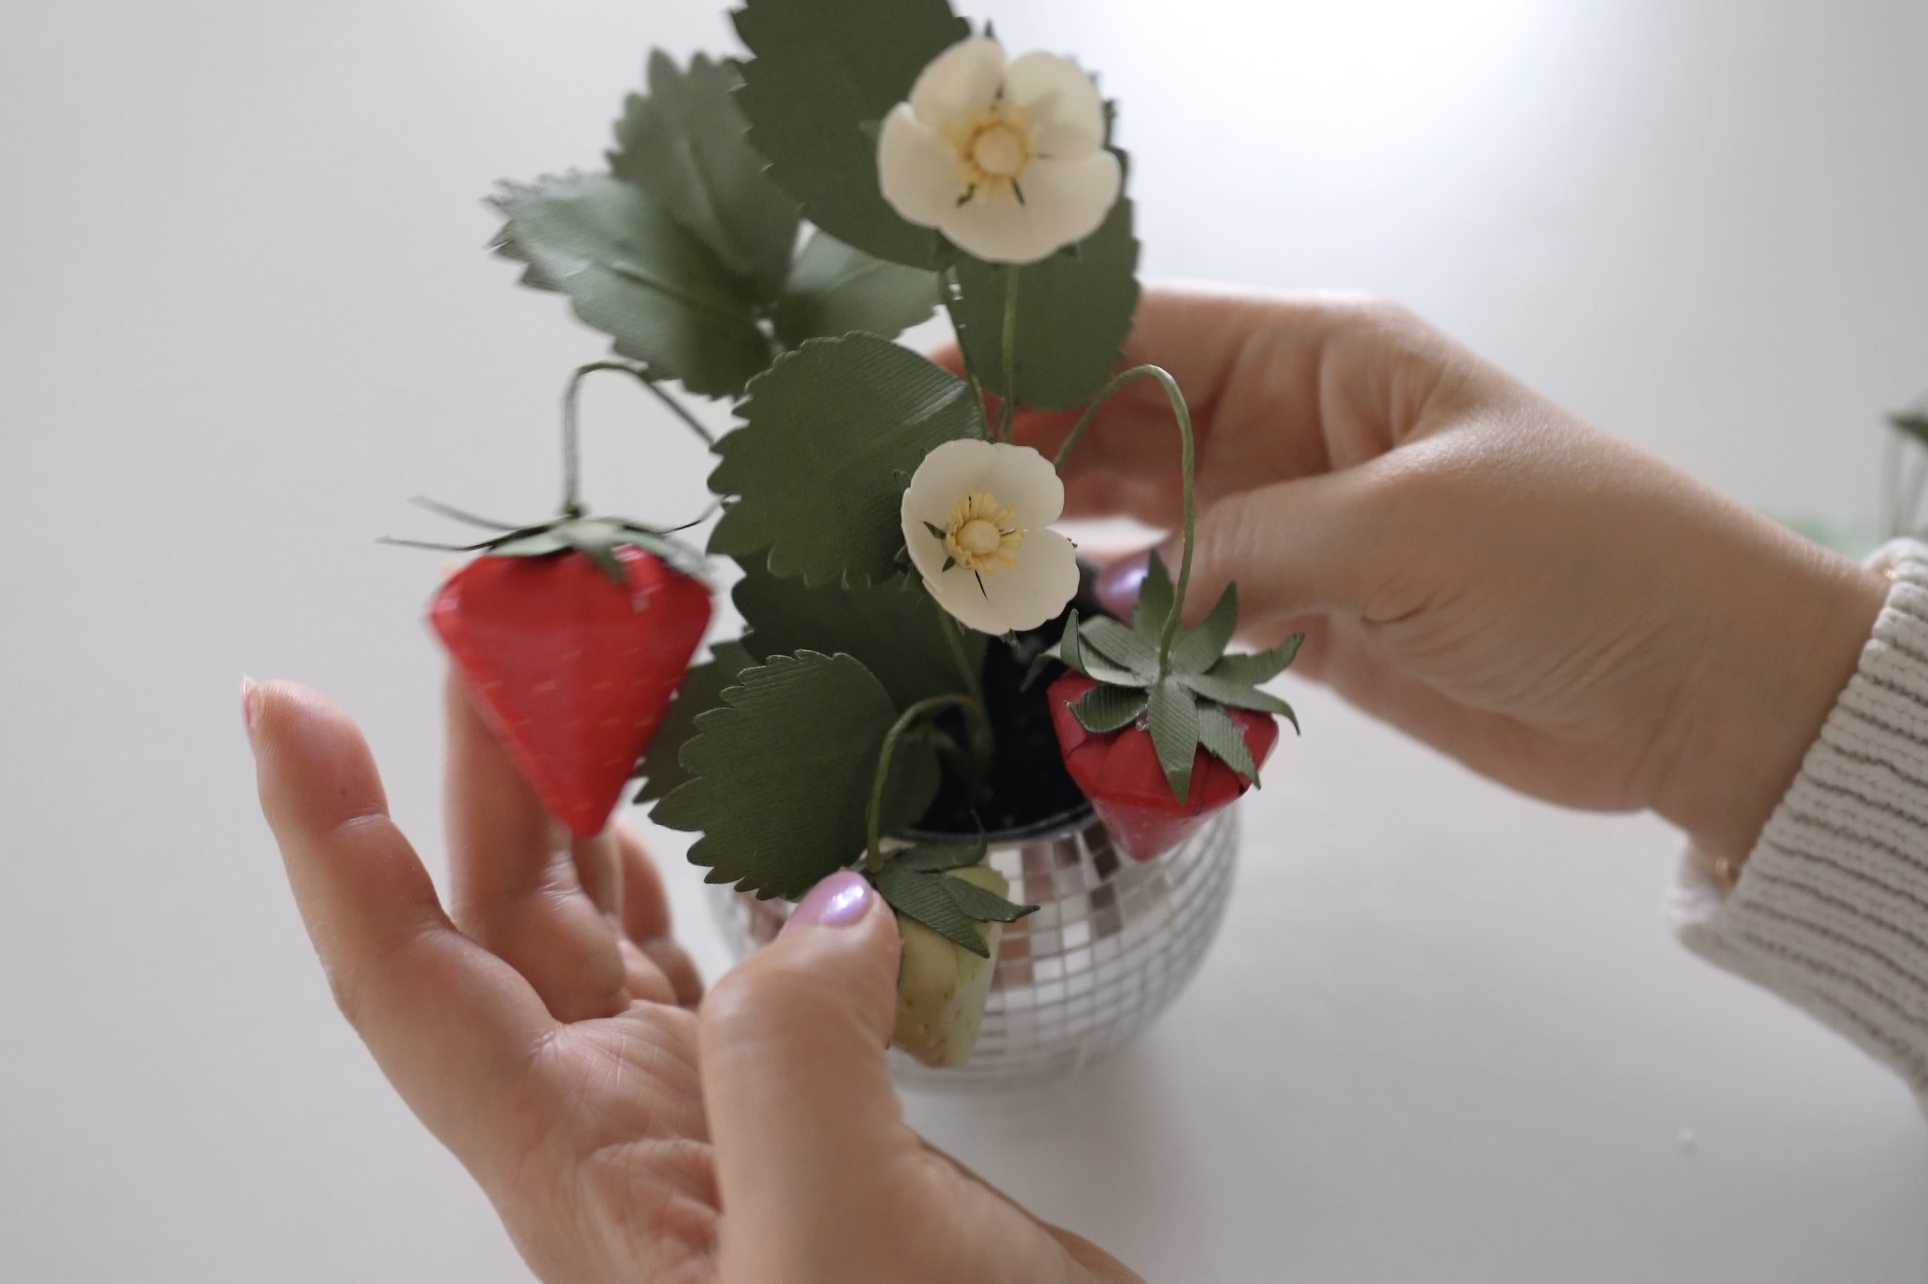
Step 5: Final Assembly
Shape the Strawberry Leaves: Curl some leaves outward and others inward for a natural look.
Build the Bundle: Use floral tape to bundle the strawberry, leaves, and flower into a charming arrangement.
Add Variety: Make multiple bundles with different sizes and shades of red, and even create a green strawberry with light green cardstock.
Display: Arrange your paper strawberries in a cute planter — I used a disco ball planter for extra charm!
You can find the template here and watch my full video tutorial above (https://youtu.be/gsii6rwwB44)
-Sara Kim