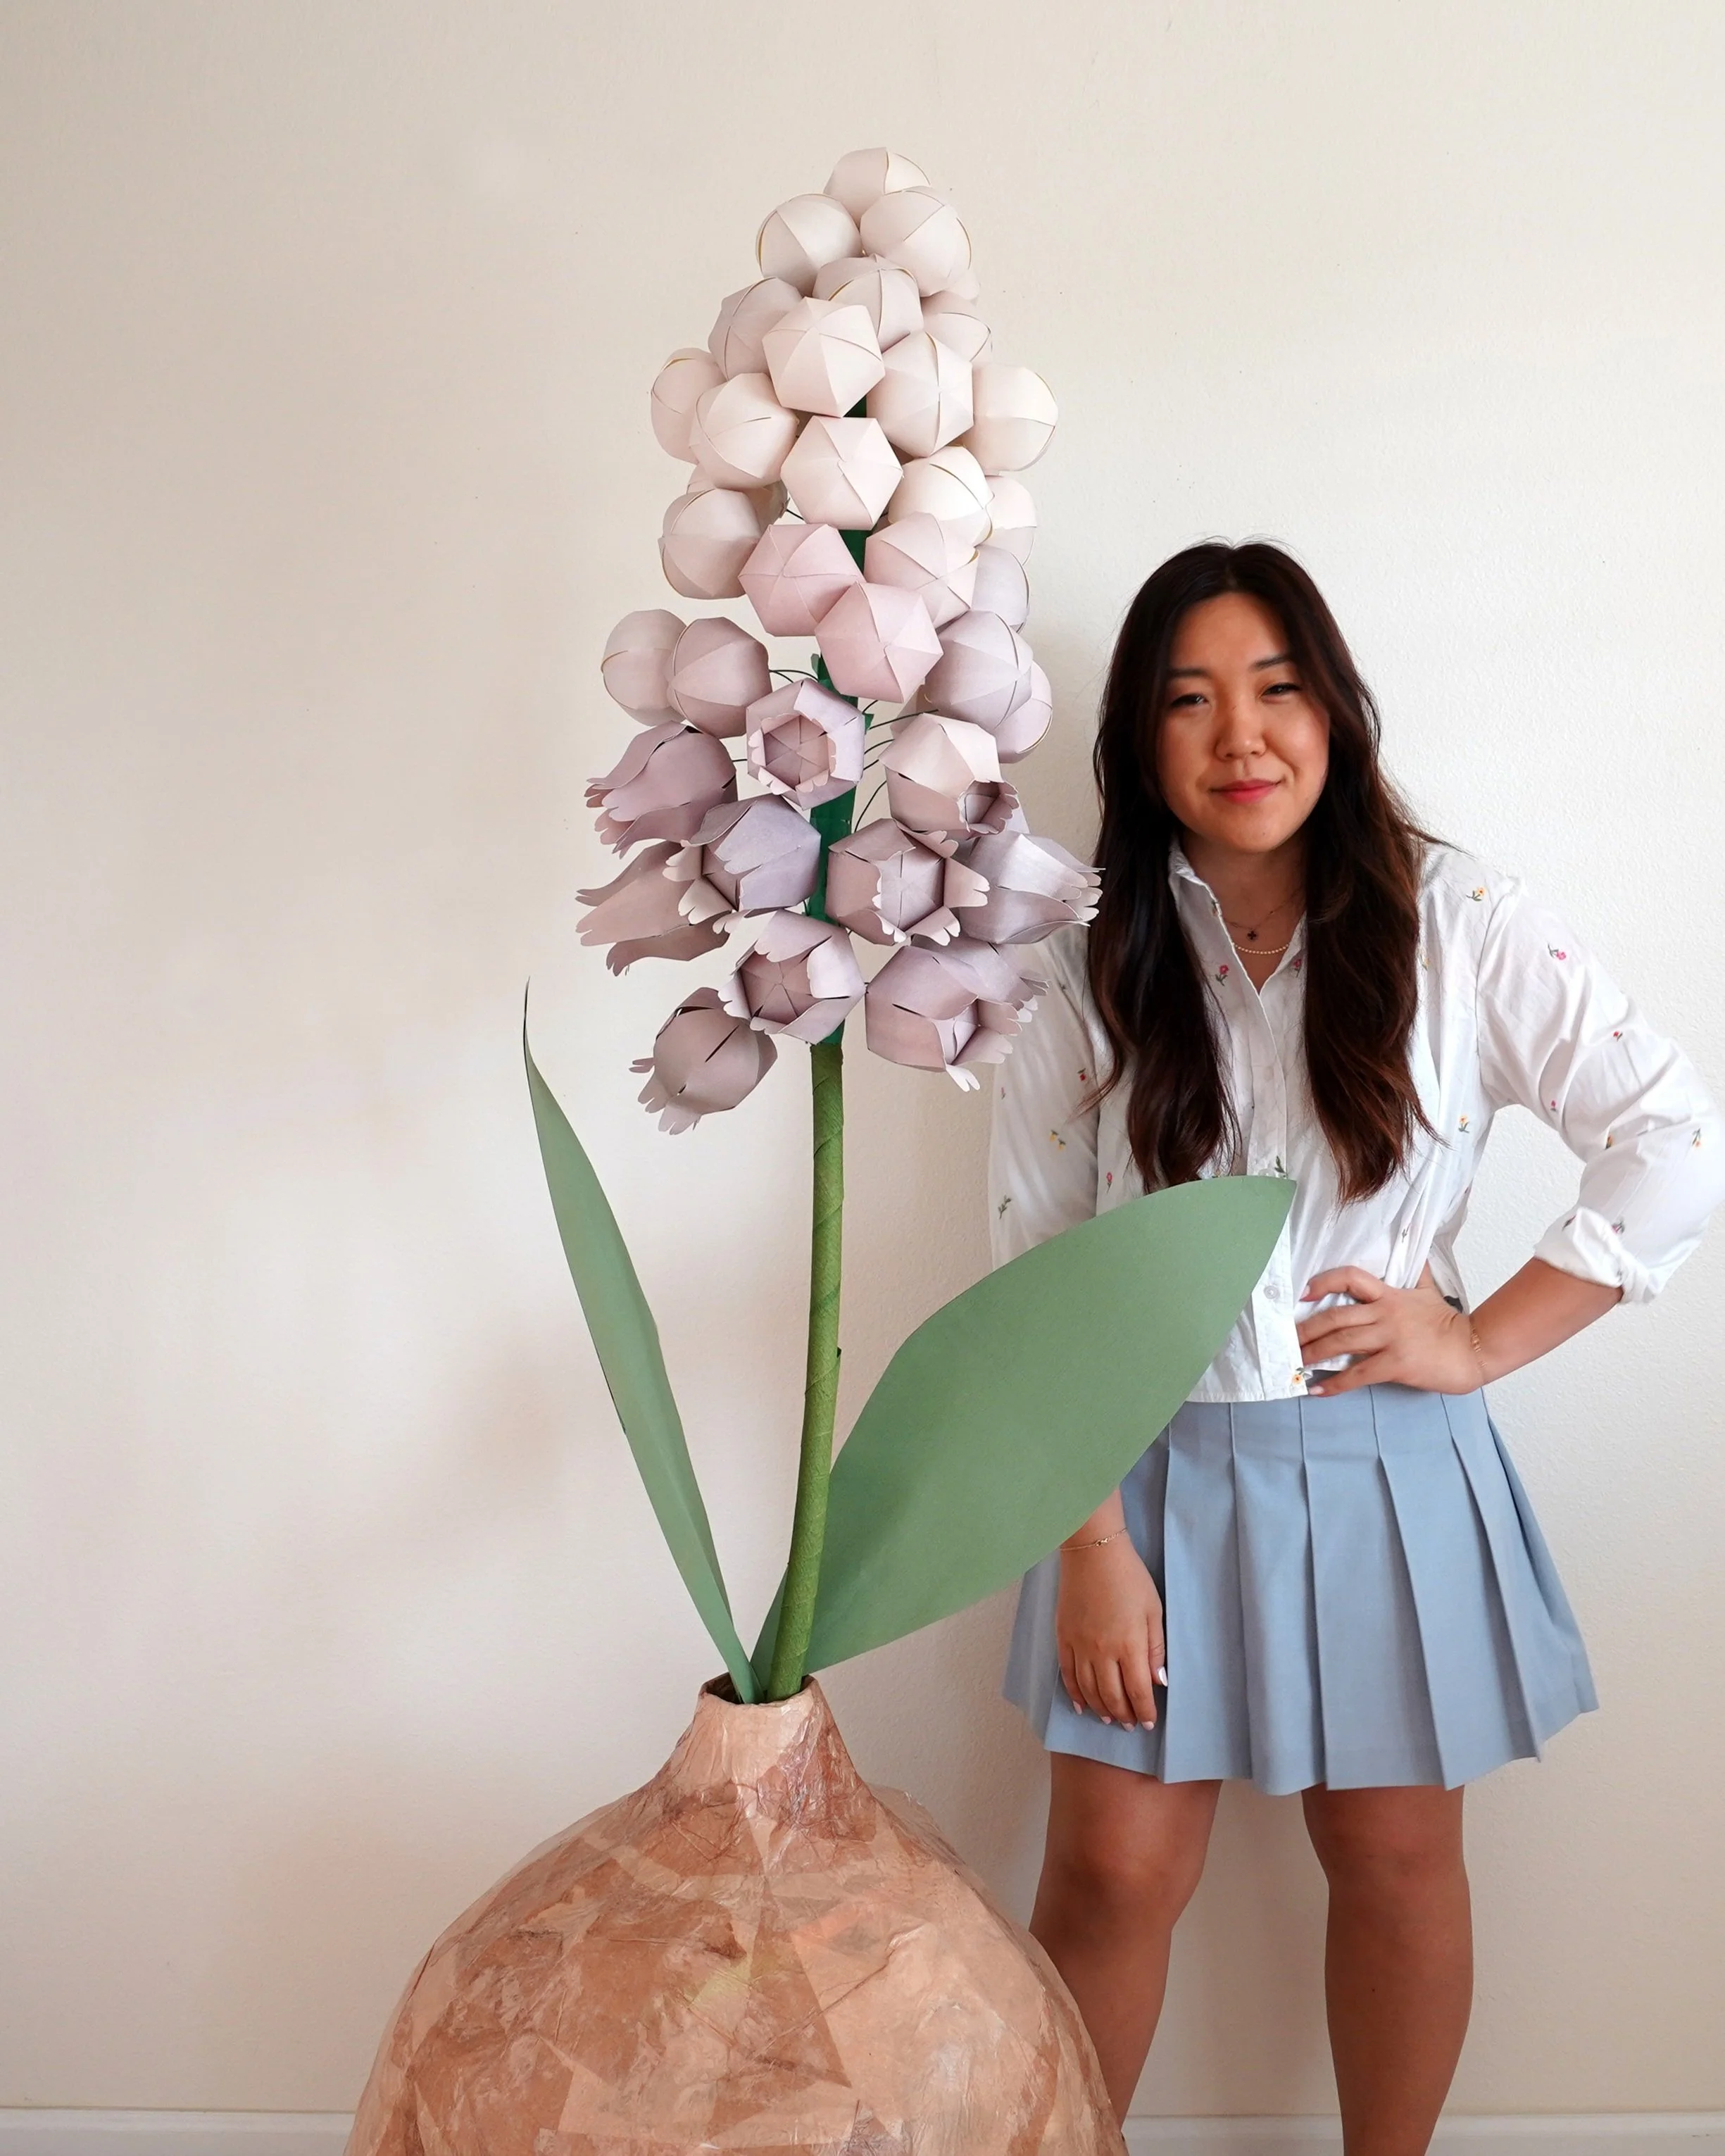
How to Make a Giant Muscari (Grape Hyacinth) Paper Flower Backdrop
Creating paper flowers is a rewarding craft, and today, I’m excited to guide you through making a stunning giant Muscari, also known as grape hyacinth. This piece is perfect for weddings, birthdays, events, retail window displays, or any space that needs a touch of whimsical beauty. Let’s dive into the process!
Materials You’ll Need
Giant Muscari Template- https://www.handmadebysarakim.com/digital-templates/giantmuscari
Light and dark-colored paper (20 sheets for lighter petals, 25 sheets for darker petals)
Hot glue and white glue
PVC pipes (including a coupler)
Scissors or cutting machine
Step 1: Preparing the Petals
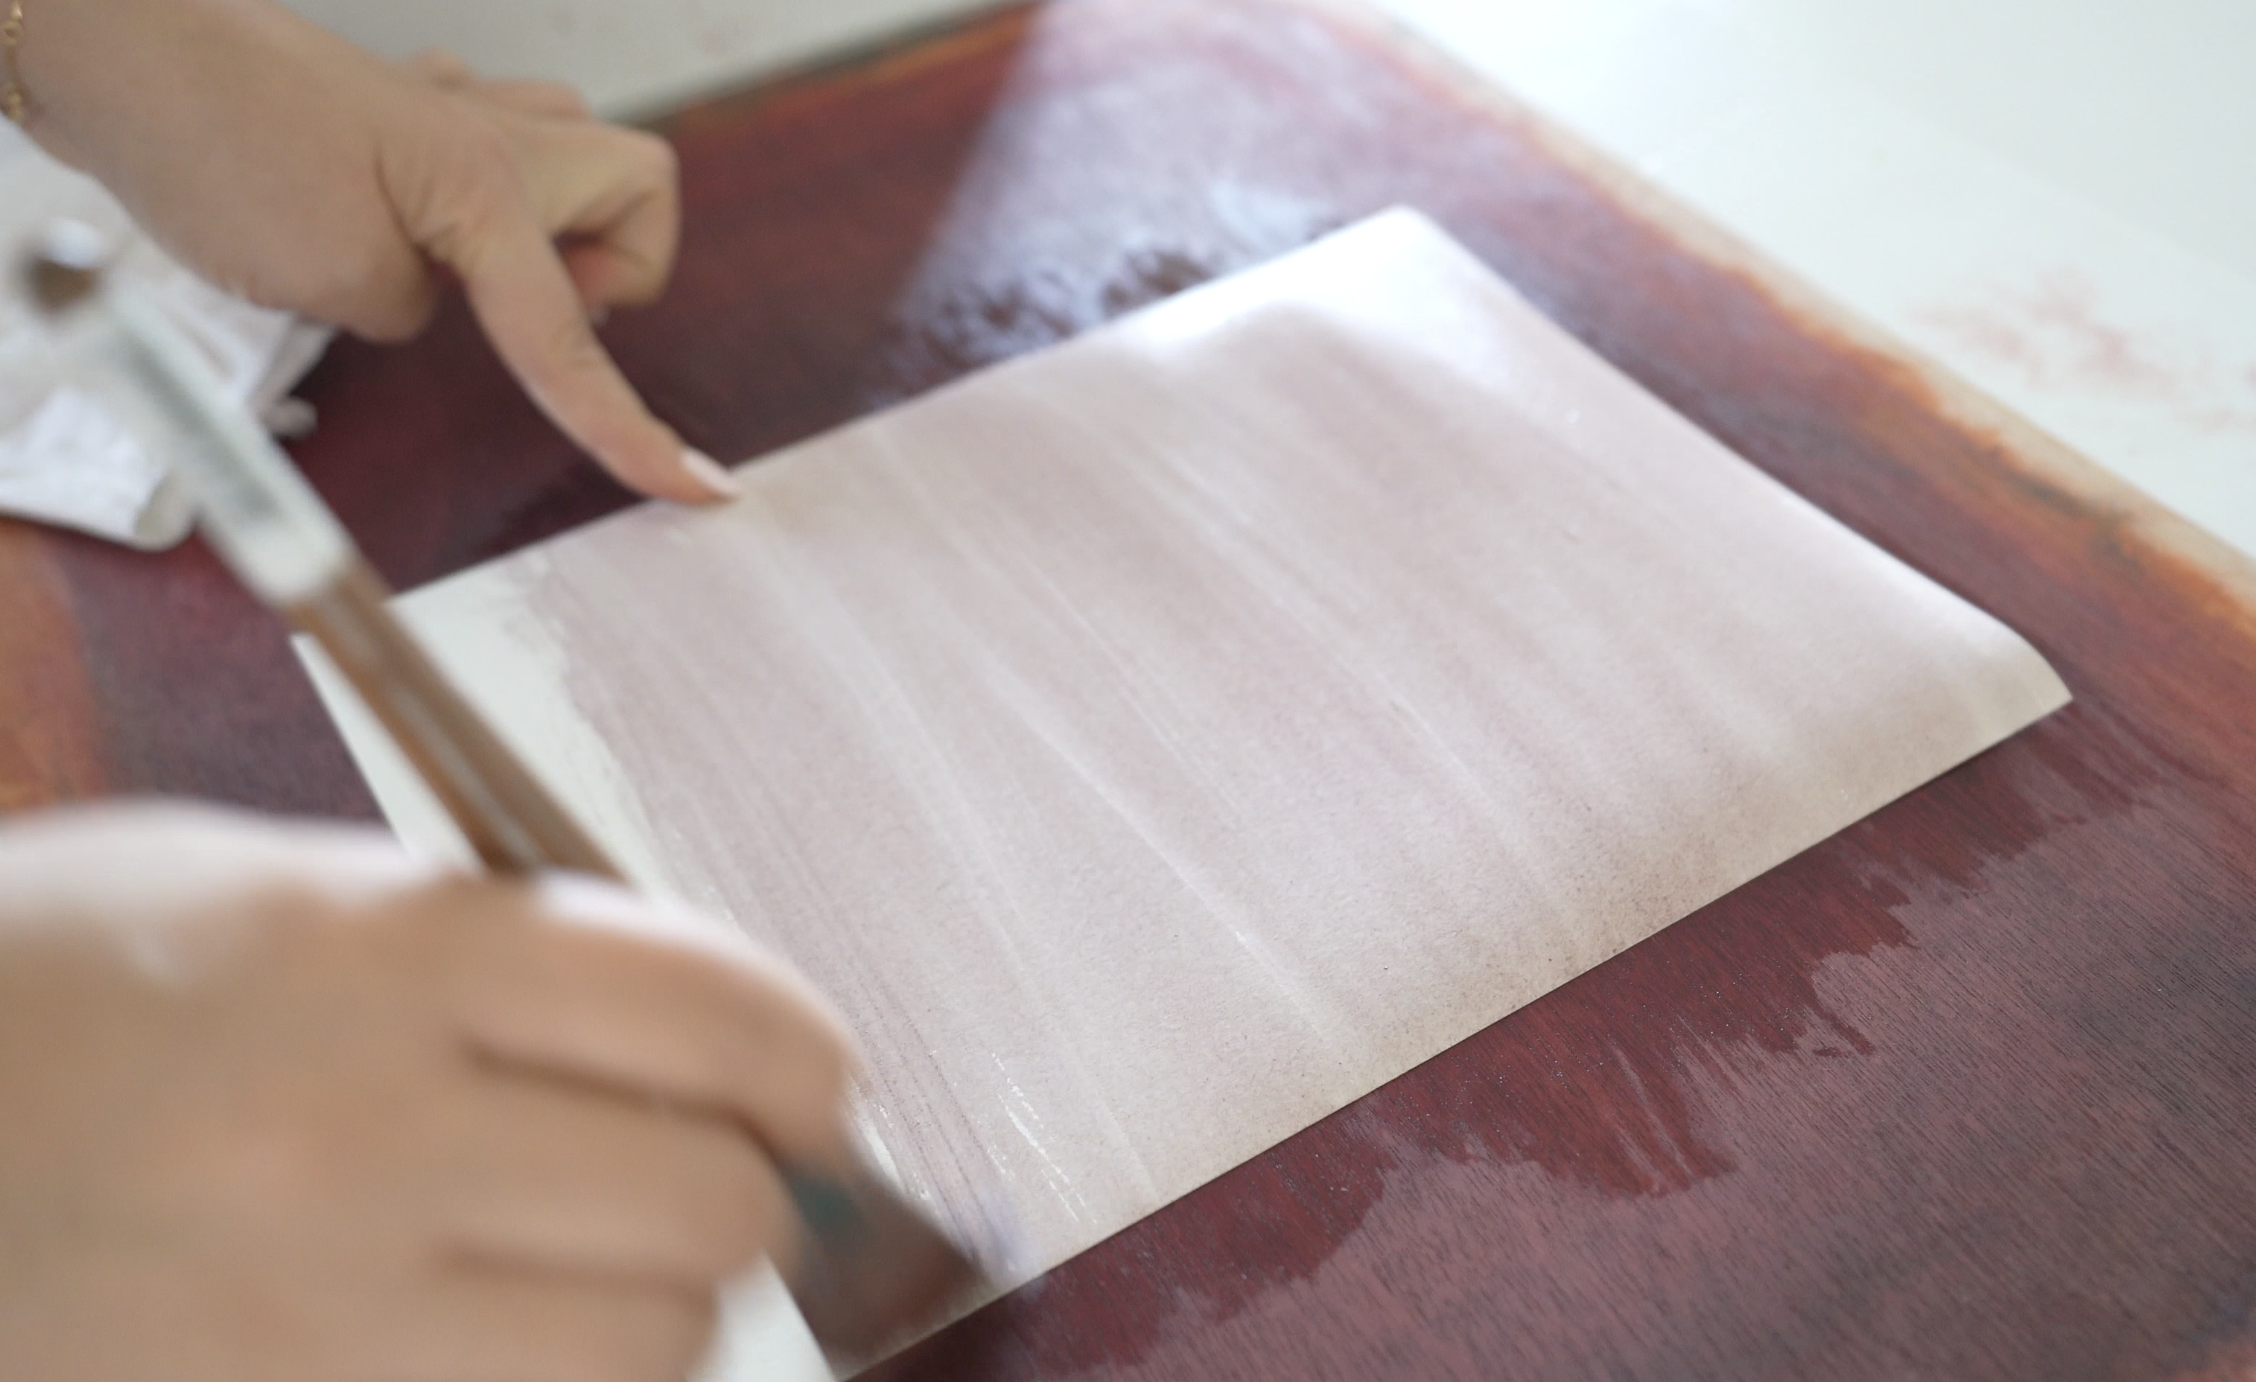
Start by cutting your paper using a Cricut, Silhouette, or scissors. If you don’t have a cutting machine, print the template and use it as a stencil. For a beautiful gradient effect, use watercolor paint on one side of the paper optional or solid color paper. Gradually get darker each sheet of paper.
Light Petals: Use lighter shades for the top flowers. You’ll need about 40 pieces, cutting two per letter-sized sheet. Painted on one side.
Dark Petals: For the lower flowers, use darker shades. You’ll need about 25 pieces, cutting one per sheet. Double-side paint these for a cohesive look.
Allow the paint to dry completely before cutting.


Step 2: Shaping and Assembling Petals
Once your petals are ready, shape them into cylinders by attaching the ends with hot glue. The color you want on the outside should face outward.
Threading the Petals: Take a floral wire, loop one end, and make it perpendicular to the rest of the wire. Insert the straight end through the holes.
Securing the Layers: Use the large circle piece to secure the petals from inside and the small circle piece for the bottom. Poke a hole in the small circle and glue it to stabilize the assembly.
Layering: Glue the petals with circle tips first, then layer the non-circle tip petals on top. Be precise to maintain a clean look.
Second version: This is similar to the first except you have to add an extra layer on top.
Step 3: Creating the Stem and Leaves
For the stem, use a ¾-inch PVC pipe. Wrap it with green masking tape as you attach the flowers, starting from the lightest shade at the top to the darkest at the bottom. Ensure no white areas are visible.
Leaves: Cut triangle-like shapes from green paper. You’ll need four sheets per leaf. Attach the straight ends in pairs, glue around the rim, and leave the bottom open.
Attach the leaves to the stem near the base and secure the flower on top.
Step 4: Adding the Stand
To make the flower easy to store and transport, use a coupler to connect the PVC pipe to a stand. This allows you to disassemble it when needed. Full tutorial to DIY the stands are here- https://www.handmadebysarakim.com/blog/2025/1/7/diy-giant-flower-stand-and-stem
Other Giant Flowers?
Other Giant Paper Flower Templates- https://www.handmadebysarakim.com/digital-templates?category=Giant%20Flower%20Template
Regular size muscari template- https://www.handmadebysarakim.com/digital-templates/muscari
Ready to Create Your Own?
Find the video tutorial above and find the templates here- https://www.handmadebysarakim.com/digital-templates/giantmuscari . Share your creations with us on social media #letsmakeflowers ! Don’t forget to subscribe to my channel for more inspiring tutorials.